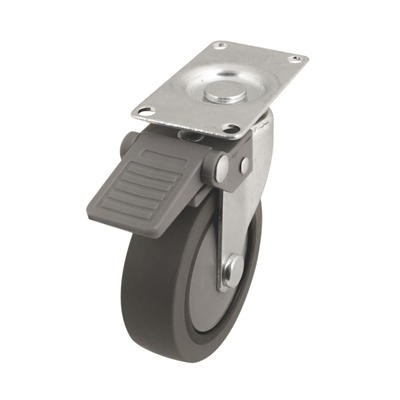
Installing rigid caster wheels is a straightforward process when you follow the proper steps. Here’s a guide to installing rigid caster wheels on your equipment or objects:
Tools and Materials You May Need:
- Rigid caster wheels
- Mounting brackets or plates
- Appropriate screws or bolts
- Wrench or socket set
- Screwdriver or drill
- Measuring tape
- Level (for ensuring proper alignment)
- Pencil or marker (for marking hole locations)
- Safety equipment (gloves and safety glasses)
Installation Steps:
- Prepare Your Equipment:
- Ensure your equipment or object is stable and on a level surface.
- If you are replacing existing casters, remove the old casters by loosening and removing the mounting hardware. Be sure to keep any necessary components for the new installation.
- Select the Right Caster Wheels:
- Ensure you have chosen rigid caster wheels with the appropriate load capacity and wheel material for your application. Check that the wheel size and diameter are suitable as well.
- Positioning and Marking:
- Determine the locations where you want to install the rigid caster wheels. They should be evenly spaced and positioned to support the load adequately.
- Using a measuring tape, mark the positions for the caster wheel mounts. Make sure they are level and aligned properly.
- Mounting Brackets or Plates:
- Attach the mounting brackets or plates to the marked positions on your equipment or object. Use appropriate screws or bolts that are suitable for the caster wheel and the material of your equipment.
- Positioning the Caster Wheels:
- Place the rigid caster wheels onto the mounting brackets or plates. Ensure that the wheel axle lines up with the holes or slots in the brackets or plates.
- Securing the Caster Wheels:
- Insert screws or bolts through the caster wheel mounting holes and into the holes or slots in the brackets or plates.
- Use a wrench or socket set to tighten the screws or bolts securely. Ensure that the caster wheels are firmly attached but not overtightened, which can restrict movement.
- Final Check and Testing:
- Double-check that the caster wheels are securely fastened and that the load is evenly distributed on all wheels.
- Test the equipment by moving it a short distance to ensure that the caster wheels function as expected and that the equipment moves smoothly.
- Adjustment and Alignment:
- If necessary, make adjustments to the mounting brackets or plates to ensure that the equipment moves in a straight line. Use a level to ensure proper alignment if precision is required.
- Safety Considerations:
- Wear safety equipment as needed, such as gloves and safety glasses.
- Check the installation periodically to ensure that the caster wheels remain securely attached.
Keep in mind that the specific installation process may vary depending on the type of equipment and the design of the caster wheels and brackets. Always refer to the manufacturer’s instructions provided with the caster wheels for any model-specific guidelines or requirements.
Proper installation of rigid caster wheels is essential to ensure stability, safety, and the reliable movement of your equipment or objects. If you are unsure about the installation process, it’s a good idea to consult with the manufacturer or a professional to ensure a safe and effective installation.


